If you like me and adore a unique piece of furniture that tells a story or are just itching to revamp a plain old chair or table, learning how to decoupage wood furniture may open up a whole new world.
It’s an incredibly creative, engaging, and wallet-friendly way to give that old, tired piece of furniture in your home a fresh, beautiful lease on life.
In DIY projects and repurposing furniture, little creates such an impact as decoupage. Not only can it transform items from drab to fab in no time at all, but it also lets you put your personal touch on your furnishings.
And trust me, once you've mastered the art of decoupage, you will find yourself looking around your home for more ways to breathe new life into cherished heirlooms, and thrift-store finds using this excellent technique.
Contents
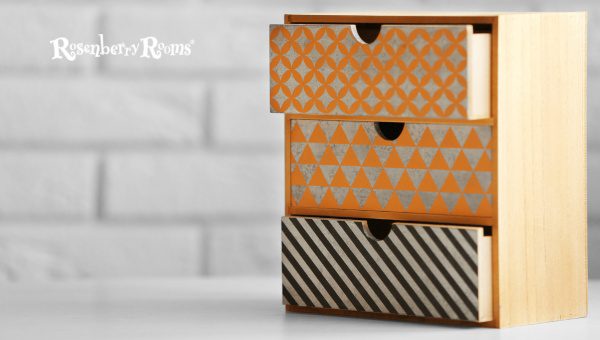
When we talk about decoupage, we're referring to the art of decorating an object by meticulously gluing colorful paper cutouts onto it in combination with special paint effects and other decorative elements.
With a variety of materials—papers, magazines, fabric scraps—and some mod podge (a type of glue, sealer, and finish used primarily for decoupage), the possibilities are truly endless. The result is a beautifully decorated item with captivating depth and radiant colors.
When discussing how to decoupage on wood furniture, we're discussing taking something simple or worn-out and jazzing it up—making it look stunning by pasting perfectly trimmed pieces of paper onto it.
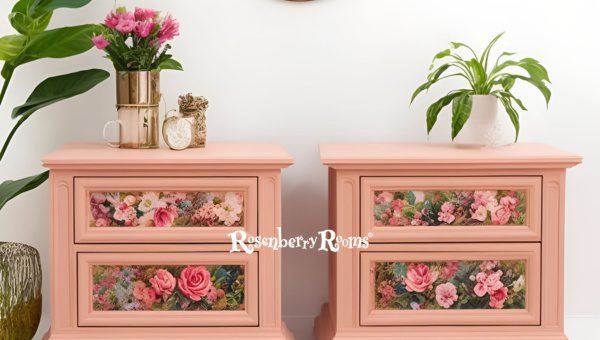
We often consider decorating our homes a significant expense, but it does not always have to be so. With time, creativity, and practice, you can give your rooms a major aesthetic upgrade using decoupage. But its benefit extends far beyond just making things look good.
Decoupage allows you to design furniture with a personalized touch. The creative possibilities it offers can help anyone turn smooth surfaces into lively works of art, injecting color and personality into any room of your home.
Let's face it: redecorating can get expensive quickly--especially when we're talking about buying new pieces of furniture. However, one of Decoupage's chief benefits is that it remains budget-friendly.
One man's trash is another man's treasure—this may well be the unofficial tagline for all who love the art of decoupage.
People often get rid of old furniture when they redecorate or move to a new place--either due to a change in decor trends or because they don't match their taste anymore.
However, these 'outdated' pieces provide an excellent canvas for those who know how to wield scissors, paper & glue.
Decoupage helps transform old or plain-looking furniture into beautiful pieces packed with character: mix-match designs on different areas; match colors with decor theme; make a distressed look using sandpaper after application of paper & paint layers.
Remember: 'old' is often code for quality workmanship & durable material--why to let go of such resilient candidates when they can be dressed up anew?
Few things are more satisfying than sitting back after hard work & admiring the transformation brought upon by diligent, creative efforts. There's pride in ownership when the effort put forth makes result truly yours!
That’s what endears me –and I bet plenty of others– to the process: There’s something uniquely compelling about owning items that reflect who we are rather than opting for cookie-cutter alternatives produced en masse by large corporations.
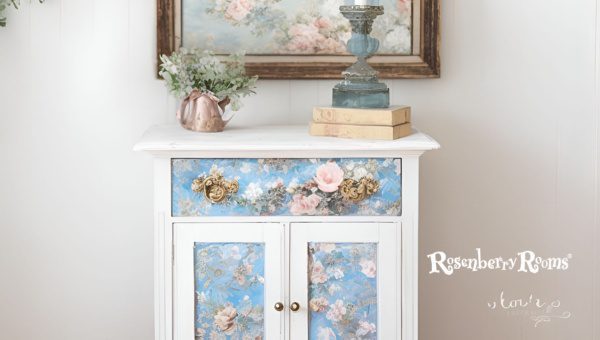
One of the most exciting aspects of Decoupage is the fantastic array of papers you can choose from. Different papers achieve diverse effects, and understanding your choices will help you create truly spectacular pieces.
Here are three popular types to consider when planning your next decoupage project: tissue papers, napkins, and printed papers.
Tissue paper is a popular choice for decoupaging as its translucent nature allows for intriguing light play and depth when overlapped.
Using napkins in decoupage is a quirky idea that has taken the craft world by storm—mainly because napkin patterns are richly detailed artworks in their own right!
When discussing printed paper in decoupage terms, we refer to pages from sources such as books, magazines, or digital images printed on regular printer paper. This opens up limitless possibilities!
Remember two things before jumping into your project:
Choosing your decoupage medium allows for creative experimentation! Be brave - mix different types in one piece!
Deciding which type of paper suits your project best depends mainly on the look and feel you're going for; be guided by trial-and-error alongside personal preference, and watch how an unassuming piece turns into art.
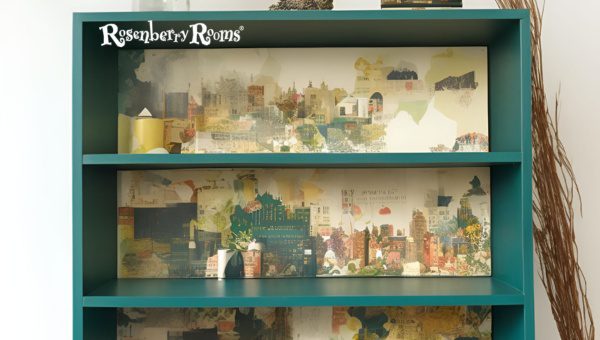
Decoupaging furniture is a fun and easy way of infusing new life into old or drab items. Whether breathing fresh air into antique furniture or creating a unique ensemble, the process remains more or less the same. Here are the initial steps for successful decoupage on wood furniture:
Like every masterpiece, great decoupage begins with good preparation. And trust me, it can make all the difference between a decoupage project that is enjoyable and one that is frustrating.
Gather your materials:
Set up your workspace:
An ideal workspace has plenty of room to move around your furniture piece and is well-ventilated if you’re working with any strong glue or varnish.
Cover your work surface: It can get messy, so protect your surfaces with newspaper or a drop cloth. Always have wet wipes on hand for cleaning spills or excess glue.
Arrange your tools: Set out all of your devices before you start. You don't want to be rushing around looking for them halfway through!
Before applying paper pieces, proper surface preparation is key to ensuring that the items adhere well and last long on your furniture.
Sanding:
For raw wood pieces: Start lightly sanding any rough spots on the wood using fine-grit sandpaper (around 120-grit).
For painted details: Essentially, you want an "abrasion" onto which glue can grip better, so lightly sand the entire piece using medium-grit sandpaper (around 80-grit).
Remember my suggestion: always sand along the wood grain – it reduces scratch marks.
After sanding, wipe away any dust residue with a dry cloth.
Cleaning:
Prepare a mixture of warm water and mild dish soap. Using another clean cloth dampened in this mixture, cleanse carefully every part of it and allow it to dry completely before proceeding further.
Preparing properly assures that when we move on to the exciting part—applying our cutouts—the items will adhere well to our wooden object.
Furthermore, starting clean extends longevity, meaning our beloved creation will look stunning for longer!
What are the next steps? The fun begins when we select those beautiful pieces of paper imagery we will use…but more about that later.
Choosing the right decoupage paper forms the heart of your DIY project. It will determine your theme, color palette, and overall aesthetic.
Making your selection boils down to personal preference. Look for designs that resonate with your style.
The next step is to cut out your chosen images. Carefully doing so ensures that they align nicely with your wooden piece. Some people may prefer to tear their pictures up for a more rustic look.
One vital ingredient in our decoupage endeavor is a reliable adhesive! You would want something that dries clear and adheres well - essentially binds everything together while maintaining its hidden status.
Ensure you apply an even layer of adhesive using a brush onto the surface where you'll place the paper cutouts.
This is where things start shaping up! Arrange your cut-outs on the furniture before gluing them down permanently.
This gives you an idea about how they'll look eventually when stuck in place. Start from one end and progress maintaining flow with each piece of art overlapping another slightly, allowing merging into an incredibly cohesive work of art by its completion.
Once satisfied with how things look dry, it's time to make it permanent! Reapply a fresh layer of adhesive (if dried out), then gently press each cutout from the center, pushing towards the edges, ensuring no air bubbles are trapped underneath, causing unsightly bumps later.
Remember how smoothing out wrinkles and air bubbles was important? Once all pieces are glued on relaxingly wait until nearly dry before trying any smoothing attempts, as doing so immediately may tear our precious paper due to excess moisture, making it extremely fragile!
Use a flat straight, edge tool like old credit cards or specialty decoupage smoother working from the center towards edges, paving the way for trapped air escape ensuring smooth application without annoying wrinkle formation.
If desired – go ahead with layering up additional cutouts creating fascinating depth and textured dimensions, enhancing the richness of the furniture's appeal.
Layering works particularly well when using different types/styles/patterns, coordinating beautifully and offering unique texture-depth combinations, transforming basic wooden structures into artistic masterpieces.
Wait between addition to each layer - patience pays off in luxurious linear illusion adding fabulous finish touch confirming mastery over this fun craft!
So there we have – a simple yet detailed guide leading you through a magical transformation journey, turning old mundane pieces into exciting new conversation starters that will impress guests at the next get-together!
Whether experienced DIYer or novice crafter, I believe everyone can enjoy satisfaction produced by successful personal creation instilled fervor love creativity! Enjoy a voyage exploring unlimited boundaries offered by decoupage art.
After hours spent cutting out that intricate design, arranging and gluing it down, and smoothing out air bubbles and wrinkles, you might think the decoupage process is over.
But don't celebrate just yet! Our project's longevity and durability depend heavily on the next important step: sealing.
Sealing is crucial because it protects your artwork from damage or wear and enhances its aesthetics by improving the finish and intensifying color and details.
Sealing is something that shouldn't be rushed or overlooked. Here are some reasons why:
In short, honest time spent on sealing ensures your gorgeous decoupage will keep turning heads for many years!
Different sealants offer varied finishes for your masterpiece. They can be divided mainly into two types:
Pick the type that suits you best depending on your desired outcome (intensity of colors, glossiness).
The process doesn't vary much irrespective of what type you use:
Whether using a brushing or spraying approach depends on personal preference & project's complexity; specific detailed projects might benefit from spray application, while others may look great with brushed-on sealants.
Drying times vary depending upon sealant type & environmental conditions, though patience always yields superior results!
Generally:
During the curing period, avoid placing objects on furniture surfaces or usage that might risk damaging finishing touches
And that's how we perfect our decoupaged furniture masterpiece—by protecting it appropriately! So go forth now confident in how decoupage can transform drab to dandy + armed with all necessary tools/explanations/tips, allowing creativity to take flight.
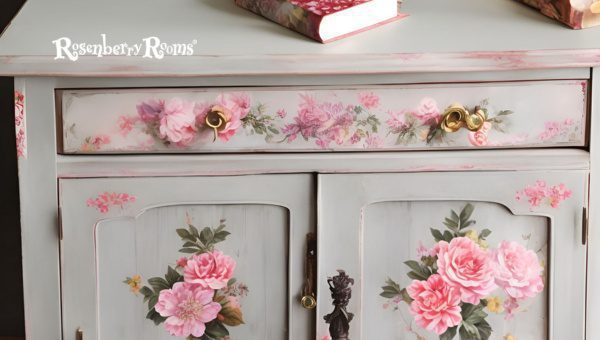
Throughout my decoupage journey, I've discovered several little "secrets" that can transform your decoupage project from good to breathtaking.
Below, I'll share some crucial tips and tricks that will help ensure your decoupage project is a triumph.
Different types of paper can result in strikingly different results in your decoupage projects:
Always consider their thickness and textures when combining different paper types in one project.
Pages from old books or maps, greeting cards, and even fabrics can all be used effectively if we consider how each paper's properties will affect the final result.
Your goal should always be to make the decoupaged image look like it was initially part of the furniture. Here are a few points to achieve seamless blending:
To create that charming "worn-out" vintage look:
Are we bare wood people? If yes, apply some stain on those sections highlighting age through the years.
My secret tip? A tiny bit of dark wax applied around corners and edges creates fantastic depth!
Want to push boundaries? Experiment with layering effects! Layer more than one piece over another, starting with the most extensive selections and building up towards the smallest ones providing depth perception.
If you're feeling even more audacious, try 3D effects creating small peaks or "pillows” using bubble wrap or sponge beneath each cutout, giving them volume before gluing them down.
Remember these golden rules:
Let's not view any less-than-successful attempt as failure; instead, see it as another step closer to mastering this addictive art form.
These tips shared from my journey might make yours less bumpy, but remember being unique with room for refinement is a true beauty.
If you're new to decoupage or looking to level up your existing skills, I'm here to provide additional resources to guide your way.
The following are my recommendations for the best tools to ensure your decoupaging goes as smoothly as possible, plus a guide on creating layered and 3D effects.
While extremely artistic, Decoupage doesn't require you to invest a fortune in materials or tools. Here's my go-to list:
Now that we have our toolbox ready, let's move forward with exploring ways in which we can add depth and texture to our decoupaged furniture:
Always remember – your creativity is the only limit in this art form, so don't be afraid to experiment!
By following these practices you'll expertly navigate the exciting journey of 'How To Decoupage On Wood Furniture.' Create something unique today.
Not! Decoupage is an easy and fun DIY project that anyone can take up. It only requires patience and creativity.
Yes, sanding the surface makes it smoother for the images or paper cutouts to adhere correctly and enhances the result.
Great question! You can use virtually any printed paper - newspaper cutouts, fabric scraps, photos, prints from magazines, even old maps!
A single layer typically takes about 15-20 minutes to dry. However, it's best to leave it overnight if you're using multiple layers or embellishments.
Absolutely! The great thing about decoupaging is that mistakes can be easily fixed – gently peel off the paper before the glue dries and start over.
At its heart, Decoupage is a beautiful means to piece together your creativity and personal style into your surroundings.
So whether you wish to rejuvenate a charming antique armoire or create a unique statement chair for your space, learning how to decoupage wood furniture can be an incredibly gratifying adventure.
It empowers you to build bespoke pieces for your home and offers endless opportunities to experiment with different kinds of paper, designs, and effects.
Remember, the beauty and charm of decoupage lie in its simplicity and accessibility. With some knowledge and tools readily available in one‘s artisan toolbox or even around the house, you can completely transform everyday items into creative masterpieces.
So pick up that brush, cut out those brilliant pieces of paper, and apply some glue – let's bring those artistic dreams into reality one piece of furniture at a time.