
Highguard All Maps & Bases Ultimate Guide (July 2026)
Highguard features 5 distinct maps and 6 defendable bases in Episode 1, each offering unique strategic advantages for the 3v3 raid shooter gameplay. Maps serve as open-world environments for Shieldbreaker battles and loot collection, while bases provide defensive fortifications where teams protect generators and anchor stones from enemy raids. Mastering each location’s layout, resources, and tactical opportunities is essential for dominating Highguard’s unique two-phase raid combat system.
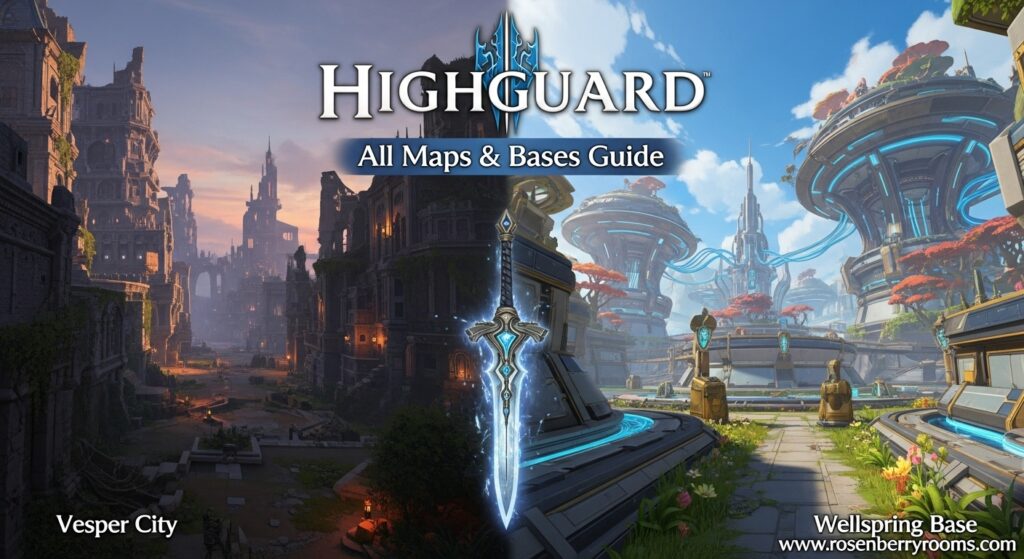
Quick Reference: Highguard Maps & Bases Overview
| Content Type | Total Available | Primary Purpose | Key Features |
|---|---|---|---|
| Maps | 5 | Shieldbreaker control & looting | Open-world, Vesper deposits, multiple POIs |
| Bases | 6 | Defense & generator protection | Fortified structures, strategic layouts |
| Game Mode | Raid Mode | Territory control | Two-phase combat system |
All Highguard Maps: Complete Breakdown
Highguard’s maps represent diverse environments across the mythical continent, each containing three Points of Interest (POIs) where Shieldbreaker spawns and valuable resources can be found. These maps rotate randomly during Raid Mode matches, requiring teams to adapt strategies for each unique environment.
Contents
Vesper City: The Ancient Trade Hub
Vesper City stands as Highguard’s crown jewel among maps, featuring sandstone halls carved over 2,000 years ago. This canyon city once served as a trade center, treasury, and arcane archive for The Iron Vigil. Now partially excavated, it’s become a major conflict zone rich with Vesper deposits and historical significance.
Key Locations:
- Warden’s Treasury: Primary hotspot featuring rare loot upgrades and Shieldbreaker spawn points at its heart
- Sunken Archives: Underground mineshafts south of the Treasury, housing abundant Vesper deposits for mining operations
- Royal Gardens: Elevated areas perfect for sniper nests, allowing teams to scope enemies heading for Shieldbreaker spawns
Strategic Advantages: Vesper City offers the best balance of loot opportunities and defensive positions, making it ideal for teams that prefer methodical resource gathering before engaging in combat.
Summit: The Frozen Kingdom
Summit presents an icy, mountainous environment where players navigate a frozen kingdom filled with high ground opportunities and ascending pathways. This map rewards teams with strong vertical control and long-range capabilities.
Key Locations:
- Queen’s Crypt: The most sought-after location containing extremely rare chests and supplies, but dangerous due to ziplines over deep trenches
- Golem Forge: Central area featuring long-range weapon opportunities, shortcuts to mountain areas, frequent Vesper deposits, loot caches, and Shieldbreaker spawns
- Frozen Shine: Tactical zone where two narrow passages converge, perfect for close-range combat and Shieldbreaker defense while claiming Vigil supplies
Strategic Advantages: Summit excels for teams with strong snipers and players comfortable with vertical combat, offering multiple high-ground advantages.
Rivermark: Industrial Waterways
Rivermark represents an abandoned industrial town dominated by water bodies and forgotten engineering marvels. This map showcases the ancestral civilization’s blend of old magic and industrial technology, with the colossal Barrier Wall remaining as an impressive peninsula structure.
Key Locations:
- Geothermal Station: Half-flooded factory area containing ample supplies and Vesper mining opportunities
- Vesper Mines: Straightforward area rich with Vesper deposits, featuring a central Shieldbreaker spawn site with easy escape routes via mounts
- Water Pumps: Located beyond the mines, featuring hidden passages for stealth movement and surprise attacks on enemies above Shieldbreaker spawns
Strategic Advantages: Rivermark benefits teams that prefer stealth and surprise tactics, with its water-based terrain providing natural cover and flanking opportunities.
Kingdom: The Ruined Coastal City
Kingdom stands as one of Highguard’s largest maps, themed around a ruined castle complex across the narrow strait from Headwall. Ancient battles once raged here, leaving behind relics, treasures, and multiple defensive structures perfect for strategic combat.
Key Locations:
- Whitevale Castle: Central site containing plentiful treasures, Vigil supply drop chests, and a hotly contested Shieldbreaker site in the Throne Room (perfect for close-quarters combat)
- Central Belltower: Sprawling vertical structure emphasizing ziplining and verticality, offering sniper vantage points and an open corridor Shieldbreaker site
- Dungeon: Underground area featuring the most loot, rich Vesper deposits, chests, and mid-range combat opportunities around central Shieldbreaker spawns
Strategic Advantages: Kingdom’s size and verticality make it ideal for teams with diverse playstyles, offering opportunities for both long-range and close-quarters specialists.
Dustline: The Desert Ruins
Dustline presents a mysterious ruined settlement in a disaster zone stretching hundreds of miles into barren wasteland. The cause of its sudden, unnatural ruin remains unknown, but abandoned factories and sites provide excellent opportunities for mounted combat and mobile warfare.
Key Locations:
- Radar Center: Abandoned facility with plentiful loot caches and an easily accessible indoor Shieldbreaker site
- Mine: Dark, Vesper-rich area with rare loot scattered along shafts and tracks, perfect for surprise enemy encounters
- Furnace: Elevated site excellent for long-range engagements, featuring narrow underground passageways for ambushing enemies heading toward Shieldbreaker spawns
Strategic Advantages: Dustline rewards aggressive, mobile teams that excel at mounted combat and rapid repositioning across open terrain.
All Highguard Bases: Complete Defensive Guide
Highguard’s six bases represent distinct defensive challenges, each requiring unique reinforcement strategies and team compositions. Unlike maps, bases are smaller, close-quarters environments where teams protect generators and anchor stones from enemy raids. Base selection occurs through team voting, making strategic preparation crucial before matches begin.
Wellspring: The Woodland Fortress
Wellspring features complete protection from an outside curtain wall surrounding overgrown woodland meadows. This base emphasizes long-range defense and strategic positioning across multiple fortified structures.
Base Layout:
- Generators: Housed in fortified outbuilding and rear keep
- Anchor Stone: Located in forward sniper tower
- Key Features: Zipline connecting tower and rear keep for rapid redeployment
Defense Strategy: Wellspring excels for teams with strong snipers and players capable of maintaining pressure across open fields. Defenders must monitor multiple approaches: the open field, back cave, and recessed streams. The zipline enables quick responses to threats, but requires constant vigilance due to multiple attack vectors.
Team Composition: Best suited for teams with Assault Wardens who can utilize ziplines effectively and Defensive Wardens who can maintain strategic positions.
Smuggler’s Den: The Coastal Stronghold
Despite lacking exterior fortifications, Smuggler’s Den proves incredibly difficult to siege due to its elevated multi-level design and explosive-trapped surroundings.
Base Layout:
- Main Structure: Massive multi-level stronghold topped by watchtower
- Defensive Features: High cliffside platforms with long-range coverage, ziplines to main structure
- Weakness: Partially submerged bunker in rear for smuggling and quick escapes
Defense Strategy: Smuggler’s Den rewards teams that can maintain high-ground control and watch for flanking attempts through the rear bunker. The elevated platforms provide excellent firing positions, but defenders must prevent enemies from seizing the critical rear bunker which can negate the base’s defensive advantages.
Team Composition: Ideal for teams with Recon Wardens who can monitor approaches and Defensive Wardens who can hold elevated positions.
King’s Lair: The Underground Fortress
King’s Lair primarily exists underground with minimal exposed walls, making it significantly less vulnerable to rocket fire and long-range attacks. Its flat earthen ceiling provides excellent sightlines while underground labyrinths create deadly close-quarters environments.
Base Layout:
- Surface Level: Flat ceiling with rocky outcroppings for sniper cover
- Underground: Labyrinth of narrow passages with low-hanging ceilings
- Approach: Excavation trench offering cover for defenders and rapid access to rear areas
Defense Strategy: King’s Lair creates natural chokepoints and funnels enemies into kill zones. The excavation trench provides defenders with excellent cover while protecting forward generators. The core’s sloping drop approach surrounded by windowed walls creates a deadly funnel when properly defended.
Vulnerability: Ceilings can be breached from above using well-placed ziplines and hammers, allowing creative infiltration strategies.
Team Composition: Perfect for close-quarters specialists and Defensive Wardens who excel in confined spaces.
Hellmouth: The Molten Fortress
Hellmouth’s defining feature is its molten moat, forcing enemies to cross numerous small bridges before reaching the interior. These bridges become death traps during defense, allowing single defenders to hold off multiple attackers.
Base Layout:
- Moat System: Molten barrier requiring bridge crossings
- Core Structures: Three massive buildings connected by suspended walkways
- Central Tower: Contains anchor stone with commanding view of attackers
Defense Strategy: Hellmouth appears impenetrable but has critical weaknesses. The small bridge crossings concentrate attackers into predictable paths, making them easy targets. The suspended walkways enable rapid movement between generator sites, but the fragile ceilings and concealed passageways create vulnerabilities for coordinated attackers.
Team Composition: Excellent for Defensive Wardens who can hold chokepoints and Support Wardens who can maintain team health during prolonged sieges.
Frosthold: The Ice Fortress
While detailed information about Frosthold remains limited in current sources, its name suggests a cold-themed base likely featuring ice-based defensive elements and potentially slippery surfaces affecting movement dynamics.
Expected Features: Based on Highguard’s design patterns, Frosthold likely combines elements from Summit’s icy environment with unique base-specific defensive structures.
Strategic Considerations: Ice-themed environments typically emphasize vertical control and may feature unique movement mechanics affecting both attackers and defenders.
Bellringer: The Tower Base
Bellringer appears to emphasize vertical combat, likely featuring tall structures and elevated defensive positions. While specific details remain scarce, tower-based designs typically reward long-range capabilities and height advantage.
Expected Features: Multiple levels, elevated sniper positions, and potentially complex vertical movement systems including ziplines and climbable surfaces.
Strategic Considerations: Tower bases typically excel for teams with strong vertical control and may be vulnerable to underground or ceiling-based infiltration tactics.
Advanced Raid Mode Strategies
Shieldbreaker Control Excellence
Success in Highguard begins with dominating the Shieldbreaker phase. Teams must balance aggressive map control with strategic resource gathering.
Optimal Shieldbreaker Strategies:
- Pre-Scout Deployment: Use Recon Wardens to identify spawn locations before committing forces
- Resource Priority: Clear nearby chests for gear upgrades during approach phases
- Crossfire Establishment: Create defensive positions covering multiple entry points before capture attempts
- Role Specialization: Assign two players for capture while others provide overwatch
- Escape Planning: Prepare multiple extraction routes for post-capture survival
Team Composition Impact: Each Warden class brings unique advantages to Shieldbreaker control. Defensive Wardens excel at holding capture points under pressure, while Assault Wardens push aggressive enemies back. Support Wardens sustain teams during extended firefights, and Recon Wardens provide critical intelligence on enemy movements.
Base Assault Mastery
Transitioning from Shieldbreaker control to base assault requires completely different strategies and equipment priorities. Successful raids demand coordinated generator sabotage and systematic base penetration.
Generator Sabotage Priority System:
| Generator Type | Strategic Value | Sabotage Time | Counter Importance |
|---|---|---|---|
| Power Core | Disables turrets | 8 seconds | Critical |
| Shield Array | Weakens walls | 6 seconds | High |
| Respawn Node | Delays defenders | 10 seconds | Medium |
Wall Destruction Methods:
- BigRig LMG: Three sustained bursts per wall section
- Explosive Abilities: Destruction Warden ultimates for rapid breaching
- Domesplitter: Creates temporary breach points for coordinated assaults
- Coordinated Fire: Multiple players focusing single sections for efficiency
Critical Warning: Wall destruction creates audible alerts, immediately notifying defenders of breach locations. Plan multiple entry points and prepare for immediate counterattacks.
Base Defense Excellence
Defending against enemy raids requires quick thinking, strategic positioning, and efficient resource management.
Defensive Priority System:
- Immediate Generator Defusal: 20-second window to prevent sabotage
- Breach Point Containment: Collapse forces rather than spreading thin
- Ultimate Ability Timing: Save powerful abilities for critical moments
- Anchor Stone Protection: Final defensive priority
- Respawn Coordination: Communicate timing for coordinated pushes
Overtime Mechanics: Matches reaching overtime create incredible comeback opportunities. Wiping the entire attacking team during overtime secures victory regardless of base damage, making coordinated ultimate abilities crucial for last-stand defenses.
Warden Class Optimization for Maps & Bases
Assault Wardens: Aggressive Map Control
Assault Wardens excel during Shieldbreaker phases, leading charges and creating entry opportunities. Their aggressive abilities shine when pushing defenders off objectives and securing initial breaches during base assaults.
Best Maps: Summit and Dustline for vertical and open-field combat
Best Bases: Hellmouth and Wellspring where aggressive pushes can overwhelm defenders
Defensive Wardens: Territory Holders
Defensive Wardens maintain captured territory and protect teammates during generator sabotage. They’re essential for holding forward positions inside enemy bases and preventing enemy advances.
Best Maps: Kingdom and Vesper City where defensive positions are plentiful
Best Bases: King’s Lair and Smuggler’s Den where defensive advantages can be maximized
Recon Wardens: Intelligence Specialists
Recon Wardens provide critical intelligence on enemy positions and defender rotations. Their abilities identify weak points in base defenses before committing to breaches and track enemy movements during Shieldbreaker phases.
Best Maps: Rivermark and Dustline where stealth and positioning matter most
Best Bases: All bases benefit from Recon intelligence, particularly complex layouts like King’s Lair
Support Wardens: Team Sustain Specialists
Support Wardens maintain aggressive pushes through healing and utility. They’re crucial during extended firefights around generator rooms and keep teams alive during prolonged Shieldbreaker battles.
Best Maps: All maps benefit from Support presence
Best Bases: Hellmouth and Wellspring where prolonged defense requires team sustain
Destruction Wardens: Fortification Breakers
Destruction Wardens tear through fortifications and create chaos. Their wall-breaking capabilities make them essential for serious raid attempts and base penetration strategies.
Best Maps: Kingdom and Dustline where environmental destruction creates advantages
Best Bases: All fortified bases, particularly Hellmouth and King’s Lair
Common Mistakes to Avoid
Strategic Errors
Overcommitting to Kills: Raid Mode rewards objective play over elimination counts. Chasing kills while ignoring generators loses matches consistently.
Poor Vesper Management: Spending all currency early prevents crucial late-game upgrades. Maintain at least 77 Vesper in reserve for critical equipment purchases.
Ignoring Soul Orbs: Destroying enemy soul orbs prevents quick respawns and maintains numerical advantages during critical phases.
Solo Raiding Attempts: Even skilled players cannot solo fortified bases. Coordination with team members is essential for success.
Mount Control Neglect: Allowing enemies free mounted movement creates defensive nightmares. Prioritize dismounting opponents to limit their mobility.
Map-Specific Mistakes
Vesper City: Failing to control Royal Gardens high ground allows enemy snipers to dominate Shieldbreaker approaches.
Summit: Underestimating Queen’s Crypt dangers leads to unnecessary falls from ziplines over deep trenches.
Rivermark: Ignoring Water Pump hidden passages results in surprise attacks from unexpected angles.
Kingdom: Neglecting Dungeon underground areas allows enemies to accumulate resources and launch unexpected attacks.
Dustline: Underutilizing mount mobility in open terrain wastes significant strategic advantages.
Community Resources & Official Channels
Official Game Resources
- Official Website: playhighguard.com – The primary source for official announcements, patch notes, and developer insights.
- Discord Community: Join the official Discord server for real-time discussions, team finding, and direct developer interaction.
- Social Media Channels: Follow Highguard on Twitter, Facebook, Instagram, and YouTube for daily updates, community highlights, and exclusive content.
- Reddit Community: r/Highguard serves as the primary hub for player discussions, strategy sharing, and community feedback.
Community Resources
- Game Wikis: Comprehensive knowledge bases providing detailed information on Warden abilities, weapon statistics, and map layouts.
- YouTube Guides: Video tutorials covering advanced techniques, base defense strategies, and Warden class optimizations.
- Twitch Streams: Live gameplay demonstrations from skilled players showcasing advanced raid tactics and coordination.
Frequently Asked Questions
How many maps and bases are available in Highguard Episode 1?
Highguard Episode 1 features 5 distinct maps (Vesper City, Summit, Rivermark, Kingdom, Dustline) and 6 defendable bases (Wellspring, Smuggler’s Den, King’s Lair, Hellmouth, Frosthold, Bellringer). Maps rotate randomly during matches, while bases are selected through team voting.
What’s the difference between maps and bases in Highguard?
Maps serve as open-world environments where teams battle for Shieldbreaker control and collect resources, featuring multiple Points of Interest and Vesper deposits. Bases are smaller, fortified structures where teams defend generators and anchor stones from enemy raids during the second phase of matches.
How do I choose the best base for my team composition?
Base selection should complement your team’s Warden classes and playstyle. Assault-heavy teams benefit from bases with ziplines and mobility options (Wellspring), while Defensive teams excel in bases with strong chokepoints (King’s Lair). Consider your team’s strengths and vote strategically during the pre-match phase.
What’s the most effective way to destroy enemy base walls?
The BigRig LMG is the most efficient wall-destroying weapon, requiring three sustained bursts per wall section. Destruction Wardens’ ultimate abilities also excel at wall breaking. Coordinated team fire on single sections maximizes efficiency.
How does overtime work in Highguard matches?
When neither team destroys the enemy base within the time limit, matches enter overtime with sudden-death mechanics. During overtime, respawns are disabled, and teams can win by either destroying the enemy base or eliminating the entire enemy team, creating incredible comeback opportunities.
What are Vesper deposits and how do I use them effectively?
Vesper deposits are blue mineral rocks scattered across maps that provide currency when struck with melee tools. This currency upgrades equipment or purchases higher-grade items from in-map shops. Maintain at least 77 Vesper for crucial late-game upgrades.
How important is team composition in Highguard?
Team composition significantly impacts success across both phases. Balanced teams with one of each Warden class typically outperform stacked lineups due to versatility. Consider map and base characteristics when selecting Wardens for optimal performance.
