I have a confession to make, I hoard treasures. Not just any kind of treasures, but the kind brimming with sentimental value and irreplaceable memories.
Among these treasures occupying a special place in my heart and home is an old hope chest passed down through generations in my family- storybook encapsulating fragments of my lineage.
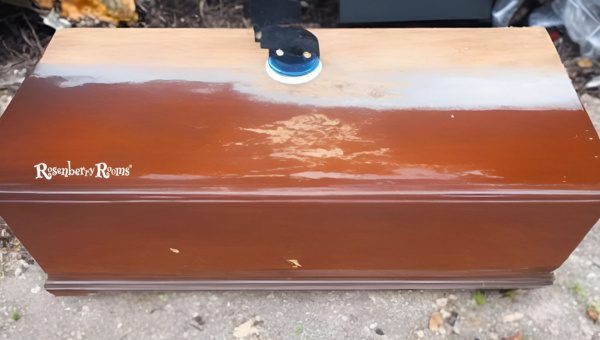
The passing years had taken their toll on this chest, which could certainly benefit from some hope chest refinishing.
This isn't an isolated scenario; many people across America have these nostalgic chests stashed away somewhere.
Some might say it's reflective of our penchant for history and tales from the past as much as it is about safeguarding valuable keepsakes.
While these chests are durable and built to last, years of use can lead to scratches, loosened hinges or faded surfaces that beg for repair and restoration.
If you're like me and want to breathe new life into your cherished keepsake but feel unsure of where to begin, fret not – I am delighted to guide you through your hope chest refinishing journey.
Contents
Refinishing an old hope chest is more than just sprucing up its appearance. It’s about preserving the historical value, drawing out hidden characteristics, and revamping it to blend seamlessly into your home's decor. Refinishing is especially important when:
Moreover, it invites a beautiful opportunity to connect with our roots while expressing our creativity.
| Aesthetic Appeal | Preservation | Increased lifespan |
|---|---|---|
| Enhances the look of old hope chests | Helps in preserving family heirlooms | Ensures that the item remains functional for years |

Before you begin your hope chest refinishing project, it's essential to assess its type and condition properly. The two main types are solid wood and veneered.
While both require similar restoration techniques, identifying the type precisely aids in choosing appropriate products.
Once you have identified whether your chest is solid wood or veneered, it's time to assess its condition.
Scratches or Scuffs: They may be superficial on the surface or deep cuts. Some gentle sandpapering can usually take care of these.
Stains or Discolourations: Look out for any water rings, ink spots, burns, or other blemishes on your chest.
Remember that hope chests are heirlooms and should be handled with care. If in doubt about the degree of damage or best course of action, consult a professional.
| Aspect | A thin layer of premium wood laid over cheaper timber | Veneer |
|---|---|---|
| Appearance | Richer grains | Thin layer of premium wood laid over cheaper timber |
| Scratch Rigidity | Can withstand more aggressive sanding | Requires gentle hand-sanding |
| Price Range | Generally more expensive | More cost-efficient |
In addition to these tips, you could seek professional advice at www.expertrefinishingadvice.com to ensure you make the best decisions for your beloved hope chest.
Always remember - patience is key when working with precious pieces like these.

Embarking on your hope chest refinishing journey necessitates having the right tools and materials at your disposal. Whether you are a seasoned DIY enthusiast or just a beginner, here's everything you'll need:
Concluding the preparation phase, we gear towards giving the hope chest a fresh new look.
Ensure you grab each item from a trusted source; try offering high-quality refinishing materials to guarantee a remarkable transformation of your hope chest.
Remember, top-quality tools and materials are an investment - they make the task more manageable and produce superior results.

Refinishing a hope chest can be incredibly rewarding, but it's crucial to remember that safety always comes first. So before you dive into the process, here are some essential safety measures to consider:
Always ensure you're working in an open space or a well-ventilated area when refinishing your hope chest. This will help disperse potentially harmful fumes from using certain refinishing materials, such as strippers or varnishes.
Be sure to wear appropriate safety gear. This should include rubber gloves to protect your skin from chemicals, a dust mask and safety glasses for protection against dust particles and fumes.
Don’t let used rags pile up on your workspace. Soaked in stain or oil, they can pose a fire hazard. Use approved containers for disposal.
Using proper tools reduces the risk of injury for DIY tasks like these. Always handle your tools with care and misuse is not advisable.
Taking preventive measures ensures not just your safety but also contributes to the results of your project. Observing these precautions creates an ideal environment for refinishing your hope chest smoothly and effectively.

Once your safety measures are in place, you’re ready to prepare your cherished hope chest for refinishing. This involves meticulous cleaning, repairing, and sanding to ensure the new finish adheres appropriately and looks fantastic.
The first step is to clean your hope chest thoroughly. Remove any loose dust or dirt using a vacuum or a soft, dry cloth. If the surface contains stubborn grime or old polish residue:
Remember, apply minimal water when cleaning; too much moisture can warp wood.
Next, scrutinize your chest for any damages– split wooden panels, broken joints or lose hinges may need fixing. Minor cracks or dents can be filled with wood filler; larger ones might require professional assistance.
Ensure all repairs are fully cured before moving on to the next step.
Use a paint scraper to gently remove chipped paint and varnish from the chest, taking care not to gouge into the wood.
If you encounter stubborn areas of finish which don’t respond to scraping methods, consider using a chemical stripper as per the manufacturer’s instructions.
(Always remember safety precautions while working with chemical strippers).
Once repairs have been made and previous finishes removed, sanding comes in:
Consider using hand-sanding blocks or power sander depending on size and condition of your hope chest.
Ensure all old finishes are entirely gone at this stage— residues can prevent new finishes from properly adhering.
Remember to clean up dust thoroughly after each stage, starting afresh contributes greatly towards achieving that perfect end result.

Sanding your hope chest is a crucial step in the refinishing process. It removes old paint or finish and any scratches or blemishes, prepping your wood for a new finish. However, improper sanding could jeopardize your whole project. Here's how to get it right:
Sandpaper comes in different types and grits. The ‘grit’ refers to the number of abrasive grains per square inch. A higher number indicates a finer, less abrasive sandpaper.
Always start with coarser paper and gradually move to finer grades as you progress through your sanding.
When you're sanding, always power-sander in line with the grain of the wood. Moving against the grain can cause unwanted scratches and an uneven surface that could adversely impact your final finish.
Use light pressure while sanding; let the machine do its job. Heavy stress can result in gashes that are difficult to cover up later.
Optimal results require little yet frequent cleaning. Use a vacuum or damp cloth to remove dust after every sanding phase — before changing from coarse to fine grit and right before moving on to staining.
While it might seem tiring, meticulous sanding paves the way for successful refinishing. Your effort here will significantly impact how beautifully your hope chest turns out once stained and polished.

Now that your hope chest is sanded and ready, it's time to apply some color. Selecting the right stain can transform your hope chest, giving it a new lease of life.
Remember that your choice should enhance the natural beauty of the wood and seamlessly complement your home decor.
With so many options in today's market, choosing a stain needn't be overwhelming.
From Oil-Based stains that offer rich color saturation to Water-Based stains preferred for their low VOC content and easy clean-up, you'll find something just right for your project needs.
Whether you choose a subtle shade to let the wood grain shine or go bold with a deep hue, ensuring it harmonizes with your living space is crucial.
Before starting to stain, use a Pre-Stain Wood Conditioner. This paves way for a more uniform and smooth finish by preventing blotchiness.
To apply,
It's important to note that all woods don’t soak up stains simultaneously - patience is key! Depending on how robust you want your color to be, you may require more than one coat.
Once this step is complete and you are satisfied with how your hope chest looks- allow adequate drying time (24 hours or as instructed on the product label) before sealing.
Enjoy watching as each stroke brings out the hidden charm of your antique piece.

After sanding and staining, it's time to add the final touch to your hope chest - polishing. Applying a finishing coat augments the overall look of your chest and serves as a protective barrier, keeping it safe from wear and tear for years to come.
One must consider durability, tone, and shine factors when choosing a finish. The most commonly used finishes include Polyurethane (high durability, available in satin, semi-gloss, or gloss) and Shellac (easy application, provides a warm golden tone).
Here’s how to apply these finishes effectively:
Applying multiple thin coats can increase durability for items like frequently used hope chests with high-traffic areas (like lids).
Provided you gave enough drying time after staining, you're ready for your first coat of finish. After each coat dries, lightly buff it with high-grit sandpaper (320-400), which results in a smoother texture.
Rinse and repeat this process until you achieve satisfactory protection and shine – voila! You've successfully refinished your hope chest.

Restoring the hardware on your hope chest is the perfect ending to an arduous refinishing journey. These often overlooked details make a striking difference in revamping a piece from ordinary to spectacular.
First, decide if you want to restore or replace the hardware. Original, intricately designed handles and latches add antique charm. Replacing them with replicas could be beneficial if they're damaged beyond repair.
To restore existing hardware:
Remember, metals like brass and copper can have specific care instructions; abide by them to prevent damage.
While choosing replacements:
Whether you choose to restore or buy new hardware, installation is straightforward:
These final touches may not seem impactful upon first thought, but you'll notice how dramatically they influence the overall appeal of your refinished hope chest.
So give this step as much love as any other; after all, every small detail counts in crafting an exquisite artifact of history.

Having invested effort and time in beautifully refinishing your hope chest, it's only fitting that we talk about how to maintain its newly minted charm.
A well-cared-for chest will continue to look beautiful and live on as a family heirloom for generations.
Dusting should be a part of your regular cleaning routine. Use a microfiber cloth or feather duster to remove dust particles from the surface gently. Stay away from wet cleaning or heavy-duty shop vacuums, as they may damage the finish.
Never let spills sit on your hope chest for long periods, as they could damage the wood and ruin the finish. Always blot up spills immediately with an absorbent cloth.
Prolonged exposure to sunlight can make your pristine finish fade over time. Hence, it's best to place your chest in a spot where it won’t be subjected to direct sunlight continuously.
Use trivets, coasters, or pads under hot dishes, drinks or anything that could scratch the surface. Do not leave plastics or rubber on your wood surfaces; certain materials can react with the finish.
A yearly application of good quality furniture polish can restore luster and cover minute scratches that might develop over time.
Maintaining your refinished hope chest isn't labor-intensive. With these easy-to-follow tips, you can keep your beloved piece looking new. After all, this isn't merely a piece of furniture - it's a cherished memory vessel that deserves exemplary care.
It's largely a matter of personal preference. Both can work well for applying wood stain, but using a brush typically offers more control over the application and can provide a more even finish.
While there are minimal sanding products available, sanding is generally recommended. It removes old finishes, smoothens your chest and provides a “grip” for new stain to adhere.
Typically, you should wait about 24 hours between coats of finish. However, this may vary based on specific product instructions and ambient humidity levels.
The entire process might span several days given drying times between steps. Planning over a weekend could allow sufficient time for your project.
If hardware pieces are damaged beyond repair or restoration, consider replacing them with replicas to maintain the antique character of your hope chest.
Breathing new life into a hope chest through refinishing is a noble path to preserving an enduring family heritage.
This rewarding project, steeped in tradition, adds sentimental value and gives you the satisfaction of restoration. Always remember to wear proper safety gear and work methodically and patiently.
Your heirloom will continue to hold cherished memories and stories while being a beautiful part of your home decor.
With this guide, you can give your treasured hope chest the makeover it deserves! After all, every layer you sand away brings you closer to revealing its intrinsic beauty beneath.