
Violence District Best Survivors Tier List (July 2026)
The ultimate Violence District Survivor Tier List ranks all survivor perks and items from best to worst for July 2026. Parrying Dagger, Grab My Hand, and Great Collapse dominate the S-tier with game-changing utility, while Bandage and Flashlight provide solid A-tier support. This comprehensive guide breaks down every survivor option with detailed analysis, helping you build the perfect loadout to escape killers consistently.
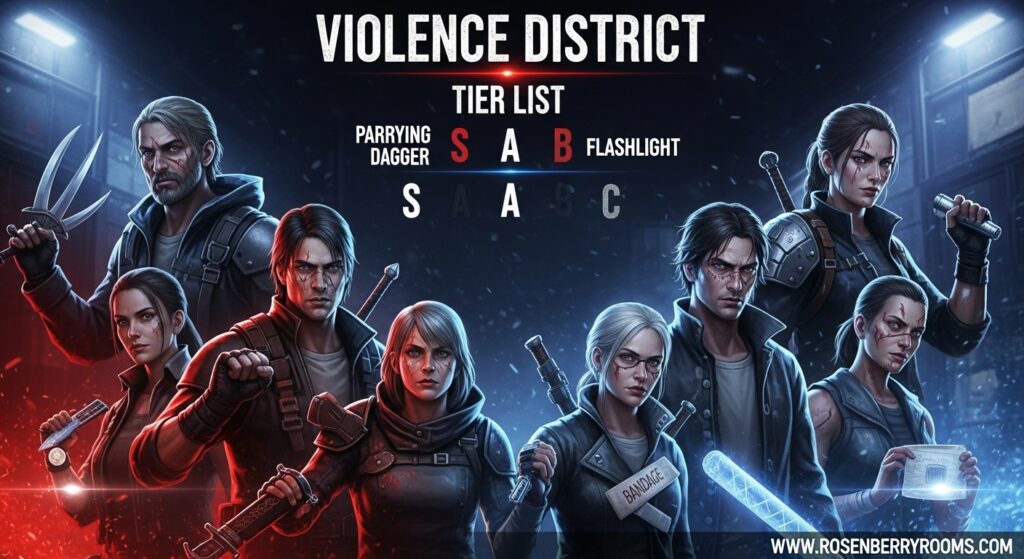
Key Information Summary
| Category | S-Tier Options | A-Tier Options | Best Overall |
|---|---|---|---|
| Items | Parrying Dagger | Bandage, Flashlight | Parrying Dagger |
| Perks | Grab My Hand, Great Collapse, Time to Grow Up, High Karma | On My Own | Grab My Hand |
| Playstyle | Aggressive parrying, Team utility | Balanced support | Team coordination |
Understanding Violence District Survivor Mechanics
Before diving into the tier list, it’s crucial to understand the core mechanics that make certain survivor options more viable than others. Violence District follows a 1-vs-all format similar to Dead by Daylight, where one killer hunts multiple survivors who must complete objectives and escape.
Contents
Survivor Status Effects Explained
Three main status effects significantly impact survivor performance:
- Winded: No speed boost + become slower, making you an easy target
- Vulnerable: You always get one-shot by killer attacks, requiring extreme caution
- Rushed Action: Fast interactions with pallets and vaulting points like windows, crucial for escape
Core Survivor Strategy
The most effective survivor strategy revolves around team coordination and proper resource management. Healing other survivors is incredibly powerful and can be abused for easy wins. However, the more survivors heal each other, the stronger The Killer becomes with his anti-heal capabilities.
Complete Violence District Survivor Tier List 2026
S-Tier: Game-Changing Options
These survivor options provide the most significant impact on gameplay and should be prioritized in your builds.
Parrying Dagger (Item)
Rank: S-Tier
The Parrying Dagger stands as potentially the best item in Violence District, but it requires skill to use effectively. You cannot spam it, as experienced killers will bait out your parry attempts. The key is waiting for the killer’s attack animation to begin before activating it.
Why S-Tier:
- Can stun any killer when timed correctly
- 40-second cooldown prevents spam but rewards skillful usage
- Some killers like The Abysswalker are particularly vulnerable to parrying
- Can parry both basic attacks and special abilities
- Game-changing potential in chase scenarios
Pro Tip: Practice against different killers to learn their attack patterns. The Abysswalker’s telegraphed attacks make him the easiest to parry, while faster killers require quicker reflexes.
Grab My Hand (Perk)
Rank: S-Tier
Arguably the best perk in Violence District due to its incredible team-wide utility. This perk should be a staple in any coordinated survivor team.
Why S-Tier:
- Provides team-wide rescue capabilities
- Significantly prolongs win chances for the entire survivor team
- Synergizes perfectly with team-based strategies
- No downside or significant cooldown limitations
- Essential for competitive play
Pro Tip: Coordinate with your team to maximize the effectiveness of Grab My Hand. Communication is key to using this perk at the right moments.
Great Collapse (Perk)
Rank: S-Tier
Great Collapse offers incredible mobility and escape potential, making it essential for survivors who prefer a more evasive playstyle.
Why S-Tier:
- Boosts speed after dropping obstacles or parrying with Parrying Dagger
- Incredible for running away and breaking line of sight
- Combines perfectly with jukes and environmental obstacles
- Survivors have third-person camera with rotate-able view, while killers have FPS – use this advantage
- Essential for escaping high-pressure chase scenarios
Pro Tip: Use environmental obstacles strategically to trigger Great Collapse’s speed boost. Combine with Parrying Dagger for maximum effectiveness.
Time to Grow Up (Perk)
Rank: S-Tier (at higher ranks)
This perk’s effectiveness scales with player skill and game knowledge, making it S-Tier for experienced survivors but potentially A or B-Tier for newer players.
Why S-Tier:
- Provides escape potential after taking damage
- Requires skill to reach obstacles or break line of sight after getting hit
- Invaluable for experienced players who know map layouts
- Scales with player skill and game knowledge
- Essential for high-rank competitive play
Pro Tip: Learn map layouts and obstacle positions to maximize Time to Grow Up’s effectiveness. This perk rewards map knowledge and quick decision-making.
High Karma (Perk)
Rank: S-Tier
High Karma provides unique utility that can turn the tide of games, especially in specific scenarios.
Why S-Tier:
- Allows instant freedom after rescuing teammates
- Creates momentum shifts during rescue operations
- Particularly powerful when you’re the last survivor standing
- No healing required immediately after rescue
- Essential for coordinated rescue attempts
Pro Tip: Save High Karma for critical rescue moments, especially when you’re the last healthy survivor. The instant freedom can catch killers off guard.
A-Tier: Solid Competitive Options
These options provide strong utility and should be considered in most builds, though they may not be as universally powerful as S-Tier choices.
Bandage (Item)
Rank: A-Tier
Bandage offers underrated self-sustain that can be crucial throughout the entire match.
Why A-Tier:
- Provides reliable self-healing without requiring teammate assistance
- Allows riskier generator and rescue plays
- Reduces dependency on teammate healing
- Consistent utility throughout all game phases
- Essential for solo queue survivors
Pro Tip: Use Bandage proactively rather than reactively. Healing before engaging in risky objectives can prevent you from being one-shot by killers.
Flashlight (Item)
Rank: A-Tier
Once considered broken, Flashlight has been nerfed but remains a strong option when used correctly.
Why A-Tier:
- Can blind killers during vulnerable animations
- Effective when killers are vaulting, breaking pallets, or picking up survivors
- Creates opportunities for rescues and escapes
- Requires strategic timing rather than spamming
- Strong counter to killer momentum
Pro Tip: Time your flashlight usage for moments when the killer’s field of view is locked, such as during attack cooldowns or when interacting with obstacles.
On My Own (Perk)
Rank: A-Tier
This perk’s effectiveness depends heavily on your playstyle and team composition.
Why A-Tier:
- Incredibly useful when playing solo or with random teammates
- Provides self-sufficiency in chaotic matches
- Can become S-Tier in disorganized teams
- Offers reliable personal utility
- Essential for solo queue survivors
Pro Tip: If you frequently play with random teammates who get eliminated quickly, On My Own becomes much more valuable and can be considered S-Tier for your playstyle.
B-Tier: Situational but Viable
These options can be effective in specific situations or with particular playstyles but generally lack the consistency of higher-tier choices.
Gate (Item)
Rank: B-Tier
Gate provides useful utility but requires planning and map knowledge to use effectively.
Why B-Tier:
- Excellent for planned escape routes
- Great for repositioning when killers are nearby
- Combines mobility, defense, and utility
- Requires map knowledge and planning
- Less effective than aggressive items like Parrying Dagger
Pro Tip: Plan your Gate usage in advance and communicate with your team about escape routes. This item rewards strategic thinking over reactive play.
Pacifist (Perk)
Rank: B-Tier
Pacifist offers unique utility but is highly situational and depends on killer choices.
Why B-Tier:
- Provides specific counters to certain killer strategies
- Situational effectiveness based on killer types
- Can be powerful in the right matchups
- Less consistent than universal perks
- Requires game knowledge to use effectively
Pro Tip: Research killer types before matches to determine if Pacifist will be useful. It’s particularly effective against killers with area-of-effect abilities.
Snake Step (Perk)
Rank: B-Tier
Snake Step provides evasion capabilities but requires precise timing and positioning.
Why B-Tier:
- Offers additional evasion options
- Requires precise timing and positioning
- Less reliable than Great Collapse for general mobility
- Can be effective against specific killer attacks
- Rewards skilled play but has a high skill floor
Pro Tip: Practice Snake Step timing against different killer types to maximize its effectiveness. This perk rewards dedication and practice.
Heads Up (Perk)
Rank: B-Tier
Heads Up provides informational utility but lacks the immediate impact of higher-tier perks.
Why B-Tier:
- Offers valuable information about killer positions
- Helps with strategic decision-making
- Less impactful than direct utility perks
- Requires good game sense to capitalize on information
- Better for experienced players who can use information effectively
Pro Tip: Combine Heads Up with communication perks to share information with your team. This perk’s value increases significantly with team coordination.
Motion Tracker (Item)
Rank: B-Tier
Motion Tracker provides informational utility similar to Heads Up but in item form.
Why B-Tier:
- Reveals killer positions and movements
- Helps with strategic positioning and escape planning
- Takes up an item slot that could be used for more direct utility
- Less effective than items like Parrying Dagger or Flashlight
- Requires map knowledge to use effectively
Pro Tip: Use Motion Tracker information to plan escape routes and coordinate with your team. The information is only valuable if you act on it effectively.
Twist of Fate (Item)
Rank: B-Tier
Twist of Fate provides random utility that can be situationally powerful but lacks consistency.
Why B-Tier:
- Offers random beneficial effects
- Can be powerful in specific situations
- Lacks consistency and reliability
- Less predictable than other items
- Can be fun but not optimal for competitive play
Pro Tip: Use Twist of Fate when you want to add variety to your gameplay, but don’t rely on it for consistent performance in competitive matches.
C-Tier: Limited Usefulness
These options generally underperform compared to higher-tier choices and should only be used in specific situations or for experimental purposes.
Nobody Left Behind (Perk)
Rank: C-Tier
This perk provides minimal utility and is generally outclassed by other options.
Why C-Tier:
- Offers very limited benefits
- Outclassed by most other perks
- Situational effectiveness at best
- Doesn’t provide significant impact on gameplay
- Generally not worth using in competitive play
Left Behind (Perk)
Rank: C-Tier
Left Behind provides some utility when teammates are eliminated but is generally ineffective.
Why C-Tier:
- Only useful when teammates are eliminated
- Doesn’t provide enough benefit to justify usage
- Outclassed by universal perks
- Limited impact on gameplay
- Generally not recommended for most playstyles
We’re Stronger Together (Perk)
Rank: C-Tier
Despite its name suggesting team utility, this perk provides minimal benefits.
Why C-Tier:
- Minimal team benefits compared to other options
- Outclassed by Grab My Hand for team utility
- Limited impact on gameplay
- Doesn’t provide significant advantages
- Generally not worth using in most situations
Killer-Specific Survivor Strategies
Different killers require different survivor approaches. Here’s how to adapt your strategy based on the killer you’re facing:
Against The Hidden (S-Tier Killer)
The Hidden is arguably the best killer due to his mobility and invisibility. When facing The Hidden:
- Recommended Loadout: Parrying Dagger + Great Collapse
- Strategy: Listen carefully for audio cues when he’s invisible
- Counter: Use environmental obstacles to break line of sight when he disappears
- Pro Tip: The Hidden’s abilities have low cooldowns, so expect frequent pressure
Against The Slasher (S-Tier Killer)
The Slasher is a free killer but incredibly strong due to movement speed boosts:
- Recommended Loadout: Flashlight + Grab My Hand
- Strategy: His Mist ability allows quick repositioning, so stay alert
- Counter: Use Flashlight during his Pursuit ability when he’s ignoring obstacles
- Pro Tip: The Slasher has slightly lower reach, so use windows and pallets effectively
Against The Abysswalker (A-Tier Killer)
The Abysswalker is high-risk, high-reward with powerful but telegraphed attacks:
- Recommended Loadout: Parrying Dagger + Time to Grow Up
- Strategy: His attacks are easier to parry but require good timing
- Counter: Learn to crouch and dodge his Dark Severance ability
- Pro Tip: The Abysswalker has great M1 range, so maintain distance when possible
Against The Masked (A-Tier Killer)
The Masked’s effectiveness depends entirely on which mask he gets:
- Recommended Loadout: Bandage + On My Own
- Strategy: Adapt your playstyle based on his mask type
- Counter: Tiger and Duck masks have insta-down M1s, so play cautiously
- Pro Tip: Bunny and Chicken masks are weaker, so you can play more aggressively
Advanced Survivor Techniques
Team Coordination Strategies
Effective team coordination can dramatically increase your survival rate:
- Healing Chain: Establish a healing rotation where survivors heal each other in sequence
- Generator Splitting: Work on different generators to apply pressure across the map
- Rescue Coordination: Time rescue attempts to maximize distraction and minimize risk
- Information Sharing: Use callouts to share killer positions and intentions
Map Control and Positioning
Mastering map control is essential for survivor success:
- Generator Priority: Focus on generators that are harder for killers to patrol
- Safe Zone Creation: Establish areas of the map that are relatively safe from killer pressure
- Escape Route Planning: Always know your escape routes before engaging in objectives
- Resource Management: Use pallets and windows strategically rather than spamming them
Chase Optimization
Surviving chases is a core survivor skill:
- Loop Management: Learn effective loops around pallets and windows
- Stun Timing: Perfect your timing for stunning killers with pallets and Flashlight
- Blood Trail Management: Use obstacles to break blood trails and confuse killers
- Third-Person Advantage: Maximize your third-person camera view to see killers approaching
Community Resources and Official Channels
Official Game Resources
- Discord Server: Join the official Violence District Discord for real-time discussions, developer updates, and community events
- Roblox Page: Follow the official Violence District Roblox page for game updates and announcements
Community Resources
- Reddit Community: Join the r/ViolenceDistrict subreddit for player discussions, strategies, and memes
Game Wikis and Knowledge Bases
- Fandom Wiki: The Violence District Fandom Wiki provides detailed information about all game mechanics
- TierMaker Community: Create and share your own tier lists on TierMaker to see how your rankings compare to the community
Frequently Asked Questions
What is the best survivor item in Violence District?
The Parrying Dagger is widely considered the best survivor item in Violence District July 2026. When used correctly, it can stun any killer and provide game-changing escape opportunities. However, it requires skill to use effectively, as you need to time your parries with the killer’s attack animations.
How do I unlock survivor perks and items in Violence District?
Survivor perks become available after reaching certain levels in Violence District. Items must be purchased using in-game currency earned from winning matches. Focus on leveling up and winning consistently to unlock the best survivor options quickly.
What’s the most effective survivor team composition?
The most effective survivor team composition typically includes a mix of utility and support: one player with Parrying Dagger for aggressive plays, one with Grab My Hand for team rescue support, one with Bandage for healing sustainability, and one with Flashlight for killer disruption.
How do I counter The Hidden as a survivor?
To counter The Hidden, listen carefully for audio cues when he’s invisible, use environmental obstacles to break line of sight, and stick with teammates for safety. The Hidden’s invisibility is less effective when survivors stick together and communicate effectively.
Is healing other survivors worth it in Violence District?
Yes, healing other survivors is incredibly powerful and can be abused for easy wins. However, be aware that the more survivors heal each other, the stronger The Killer becomes with his anti-heal capabilities. Balance healing with objective progression for optimal results.
What’s the difference between survivor perks and items?
Survivor perks are passive abilities that provide ongoing benefits throughout the match, while items are active tools that survivors can use during gameplay. Perks are unlocked through leveling, while items must be purchased with in-game currency.
How often is the Violence District meta updated?
The Violence District meta typically shifts with major game updates, which usually occur every 2-3 months. However, balance patches and minor adjustments can happen more frequently. Stay connected with the official Discord and social media channels for the latest updates.
Can I be successful as a survivor without S-Tier perks?
Yes, you can be successful as a survivor without S-Tier perks, but it requires more skill and game knowledge. A-Tier options like Bandage and Flashlight are still very strong, and player skill often matters more than perk selection in determining match outcomes.
Conclusion and Final Recommendations
This comprehensive Violence District Survivor Tier List for July 2026 provides everything you need to dominate as a survivor. The S-Tier options—Parrying Dagger, Grab My Hand, Great Collapse, Time to Grow Up, and High Karma—offer the most significant impact on gameplay and should be your primary focus when building your survivor loadout.
Remember that while tier lists provide excellent guidance, player skill and game knowledge often matter more than individual perk or item selections. Practice your timing, learn map layouts, and develop team coordination skills to maximize your effectiveness as a survivor.
Stay updated with the latest meta changes by following official channels and community resources, and don’t be afraid to experiment with different combinations to find what works best for your playstyle. With the information provided in this guide, you’re well-equipped to climb the ranks and become a top-tier Violence District survivor.
Bookmark this guide and check back regularly for updates as the Violence District meta continues to evolve throughout 2026!
